MASTER – SLAVE MYSQL REPLICATION TUTORIAL FOR NEWBIE
In this guide I will show you practical steps (with pictures) how to setup MySQL Replication in Master – Slave mode on either CentOS or Ubuntu server. I believe MySQL replication technique is not expert-only stuff but even newbies can learn and use this technique. In case if you didn’t know yet, let’s start with a short introduction about what is it.
MEET MYSQL REPLICATION
MySQL Replication is a method to create synced backup of your MySQL database. You can call it hot backup or a backup that’s always up-to-date and ready-to-use in case the main one crashes or down. Master – Slave replication is just one of available mode that is commonly used in many production system. So this tutorial is the simplest one (one master will send information to a single slave) which newbies can follow and use it at their production servers. Better take backup than not!
What’s the main purpose of MySQL Replication? It is to create a redundant MySQL server setup which is also very useful in terms of Data Security, Fail-over Solution, Database Backup from Slave, Analytics (to analyze it without using the main database), etc.
INGREDIENTS:
What you’ll need:
- Two VPS servers: this can be in single node, same providers, or at separate / different nodes (different providers / locations). Need recommendation? See my list of recommended providers or the 20 low end cloud servers.
- Either CentOS or Ubuntu running on top of it
- Note down Master and Slave IPs.
- About 30 minutes of your time
- A cup of coffee or tea
What I use in this tutorial:
- A 512MB RAM cloud server from Atlantic.net as Master server.
- A 512MB RAM droplet from Digital Ocean as Slave server.
- Both running CentOS 6.x 32-bit
- MySQL version I use is v5.1.73 at both Master and Slave.
- A cup of Torabika coffee.
PREPARATION
First thing first, you have to install MySQL server on both Master and Slave server. In case if you haven’t installed it yet, you can follow my previous articles:
Do not forget to note down the password of MySQL root user.
FYI, you can also have MySQL server installed via Control Panel software like Vesta CP at Master server while install ONLY MySQL server manually on Slave.
Before we step up, I use these imaginary IPs which you can replace with your own IPs:
Master server: 111.111.111.111
Slave server: 222.222.222.222
SETUP MYSQL MASTER NODE
Do these steps on Master Node:
Step 1 – Edit MySQL configuration file using your favorite text editor like vi or Nano. Command below uses Nano editor:
|
1
2
3
4
5
|
## On Ubuntunano /etc/mysql/my.cnf## On CentOSnano /etc/my.cnf |
You may firstly need to edit IP binding configuration (especially in Ubuntu). Change 127.0.0.1 at bind-address with the IP of your Master server
|
1
2
3
4
|
bind-address = 127.0.0.1## change 127.0.0.1 with IP address of your Master nodebind-address = 111.111.111.111 |
Step 2 – Now put these lines right after the [mysqld] section:
|
1
2
3
4
5
6
7
8
|
server-id=1binlog-do-db=databasenamerelay-log=/var/lib/mysql/mysql-relay-binrelay-log-index=/var/lib/mysql/mysql-relay-bin.indexlog-error=/var/lib/mysql/mysql.errmaster-info-file=/var/lib/mysql/mysql-master.inforelay-log-info-file=/var/lib/mysql/mysql-relay-log.infolog-bin=/var/lib/mysql/mysql-bin |
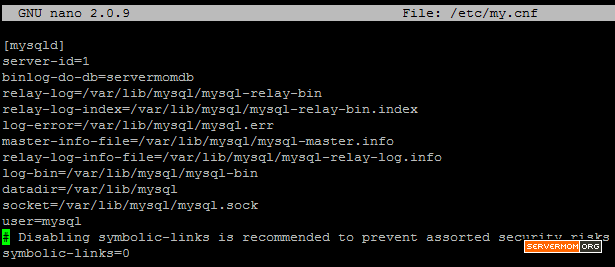
Change databasename with the database name you want to replicate / copy it to the Slave server. You can include more than one database by repeating this line for all of the databases you will need. I use servermomdb as my database name for this example. Screenshot pic:
Once done, save changes and exit the editor. In Nano it is Control+O then Control+X.
Step 3 – You can now restart mysql service:
|
1
|
service mysql restart |
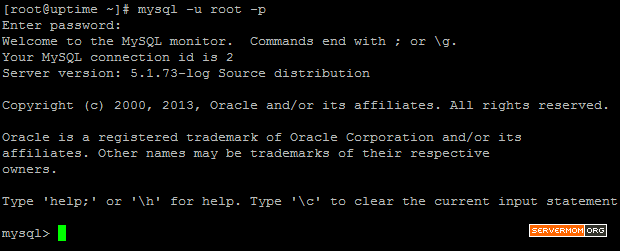
Step 4 – Login to MySQL shell as root using password you defined :
|
1
|
mysql -u root -p |
Step 5 – Here’s a little bit tricky part. Pay attention closely to each command is issued inside MySQL shell. What you are going to do is: to create the slave user and grant privileges for replication task, flushing privileges and lock the database.
|
1
2
3
|
GRANT REPLICATION SLAVE ON *.* TO 'replicauser'@'222.222.222.222' IDENTIFIED BY 'replicapass';FLUSH PRIVILEGES;FLUSH TABLES WITH READ LOCK; |
Do not forget to replace replicauser, 222.222.222.222 and replicapass accordingly.
- replicauser = is new MySQL user for replicating purpose.
- 222.222.222.222 = is Slave IP
- replicapass = is password for the new MySQL user.
Here’s an illustration of mine. I use servermom as user and a1b2c3d4 as password:
Step 6 – You’ll need to find out the mysql-bin name and its Position then note it down (I simply open up Notepad and note it there). Still in MySQL shell, use command below:
|
1
|
SHOW MASTER STATUS; |
it should give you output similar to this:
In my case I have to note the mysql-bin.000002 and 106, yours will be different.
Step 7 – You can now exit MySQL shell:
|
1
|
quit; |
and continue by exporting the database file you wish to copy it to the Slave:
|
1
|
mysqldump -u root -p databasename > databasename.sql |
change databasename with yours.
TRANSFER THE DATABASE TO SLAVE
It’s time to transfer / copy your database to the Slave server. You can do this using SCP.
This is the easiest method available. The command is:
|
1
|
scp -P 22 /root/databasename.sql root@222.222.222.222:/root/ |
Change 22 with specific SSH port (if you changed it) of your Slave server., also changedatabasename.sql and 222.222.222.222 with yours. Example of mine:
SETUP MYSQL SLAVE NODE
Leave the first server (Master node) for a while and now login to your second server which is the Slave node as root. Issue all command in this section only on Slave node.
Step 1 – Edit MySQL configuration file using your favorite text editor like vi or Nano. Command below uses Nano editor:
|
1
2
3
4
5
|
## On Ubuntunano /etc/mysql/my.cnf## On CentOSnano /etc/my.cnf |
Step 2 – Now let’s configure MySQL configuration file in your Slave server. Copy paste these configuration right after the [mysqld] section:
|
1
2
3
4
5
6
7
8
9
10
11
12
|
server-id=2master-host=111.111.111.111master-connect-retry=60master-user=replicausermaster-password=replicapassreplicate-do-db=databasenamerelay-log = /var/lib/mysql/mysql-relay-binrelay-log-index = /var/lib/mysql/mysql-relay-bin.indexlog-error = /var/lib/mysql/mysql.errmaster-info-file = /var/lib/mysql/mysql-master.inforelay-log-info-file = /var/lib/mysql/mysql-relay-log.infolog-bin = /var/lib/mysql/mysql-bin |
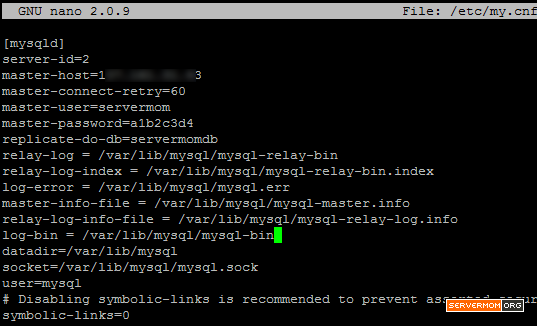
Change 111.111.111.111 with IP address of Master server. Change replicauser, replicapass and databasename with yours. Example:
Save changes and exit text editor which in Nano it is Control+O then Control+X.
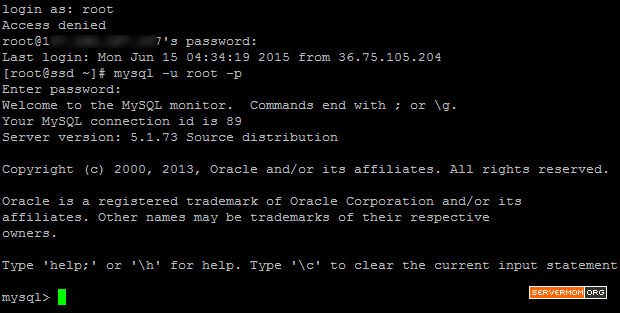
Step 3 – Login to MySQL shell as root:
|
1
|
mysql -u root -p |
pic:
Step 4 – Create new database with same name then exit MySQL shell:
|
1
2
|
CREATE DATABASE databasename;quit; |
replace databasename with your own real database name. Example:
Step 5 – Restore database you have transferred previously using this command:
|
1
|
mysql -u root -p databasename < databasename.sql |
Step 6 – Restart MySQL server to apply / load changes:
|
1
|
service mysqld restart |
example:
Step 7 – Login back to MySQL shell as root to do some important tasks:
|
1
|
mysql -u root -p |
First task is to stop the Slave so you can define where to look for Master log file.
|
1
2
|
slave stop;CHANGE MASTER TO MASTER_HOST='111.111.111.111', MASTER_USER='replicauser', MASTER_PASSWORD='replicapass', MASTER_LOG_FILE='mysql-bin.000001', MASTER_LOG_POS=12345; |
Change 111.111.111.111, replicauser, replicapass, mysql-bin.000001 and 12345 with yours. Example of mine:
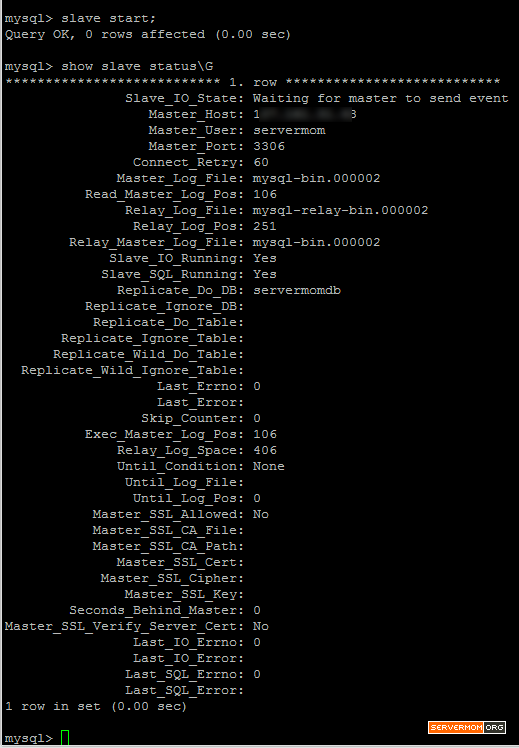
Once done, now you can start Slave and show its status with this command:
|
1
2
|
slave start;show slave status\G |
It will give you an output similar to this:
If you see something similar to above pic then you are success. There are few lines to pay more attention with: Last_Error will be blank, and Slave_IO_State will report “Waiting for master to send event“, also the Seconds_Behind_Master will indicate how far behind it is. If you see those then congratulation you have configured MySQL slave replication.
You can now exit MySQL shell:
|
1
|
quit; |
FINISHING UP
Leave Slave server for a while and go back to Master server. Login back to MySQL shell at Master server:
|
1
|
mysql -u root -p |
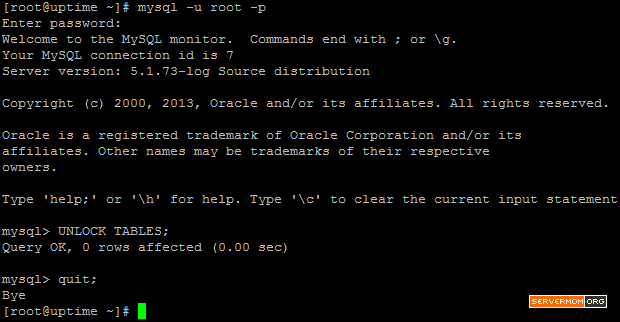
this is important, as you locked the tables of MySQL database in Master server, you can now safely unlock it:
|
1
2
|
UNLOCK TABLES;quit; |
pic:
In production environment this is very important to make sure database between Master and Slave can be synced easily, but visitors / users of your websites will not able to make changes (post comment, add article, etc) during your time setting up MySQL replication above. But however you’ll not suffer any downtime during the process. That’s it.
Additional Note:
Once Master – Slave mode is enabled and succeed, the MySQL root password of Slave server will change following its Master.
If you accidentally change a row of data on your slave or if there is an issue in connecting, try issuing this command inside MySQL shell:
|
1
2
3
|
STOP SLAVE;SET GLOBAL SQL_SLAVE_SKIP_COUNTER = 1;START SLAVE; |
Do not forget to follow me on twitter to get notified quicker when a new article is posted. Have fun!
